- cell phone or camera (optional)
- "Color Mixing" chart (from Day 2)
- craft sticks
- finger paint paper
- finger paints (black, blue, red, yellow, white)
- plastic plates
- color
- dark
- darker
- darkest
- finger paint
- light
- lighter
- mix
- paint
- shade
MA Standards:
Language/L.PK.MA.6: Use words and phrases acquired through conversations, listening to books read aloud, activities, and play.
Head Start Outcomes:
Language Development/Receptive Language: Attends to language during conversations, songs, stories, or other learning experiences.
Language Development/Expressive Language: Uses language to express ideas and needs.
PreK Learning Guidelines:
Mathematics/Patterns and Relations 7: Explore and describe a wide variety of concrete objects by their attributes.
Explore Together (indoors): Colors By Hand

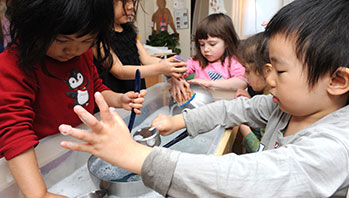
© Commonwealth of Massachusetts, Department of Early Education and Care (Jennifer Waddell photographer). All rights reserved.
STEM Key Concepts: There are many different colors; A color can have many different shades (from very light to very dark); White paint mixed with a color makes a lighter shade of the same color; Black paint mixed with a color makes a darker shade of the color; Two or more colors can be combined to make a new color
ELA Focus Skills: Creative Expression, Follow Directions, Speaking and Listening, Vocabulary
Display the "Color Mixing Chart" you made earlier in the week. Tell children that today they will explore mixing colors with finger paints. Encourage children to turn to a buddy as they refer to the chart and discuss colors they want to make.
Before beginning the activity, go over some basic procedures for using finger paints, such as:
- Paint on the shiny side of the paper: Have children feel both sides of the paper and help them identify the smooth, shiny side of the paper.
- Keep the finger paint paper on a newspaper or a washable surface (you may want to tape the paper down with masking tape).
- Use hands as well as fingers to paint: Ask two volunteers to demonstrate: Place two blobs of paint on the paper. Have one child put his finger into the paint and make a stroke, have the other child place the palm of her hand on the paint and make a thick stroke.
- Use a clean craft stick to place a new color on the paper so colors don’t get muddled in their containers: Demonstrate how colors get muddled if you use the same stick in the yellow and blue paints.
- Explain and demonstrate clean-up techniques.
Allow children to freely explore the finger paints as they mix new colors and shades of colors. Encourage children to refer to the chart and talk about colors they want to make and how they will make each color. Document children’s explorations with photographs or have children document one another’s explorations. Listen and watch as children explore and ask questions such as,
- Why do you think the shiny side of the paper works well when finger painting? Let children explore the dull side with paints.
- Josh’s color looks the same as Anita’s color. I wonder if you both made the color the same way. Can you describe how you made that color?
- What would you do if you wanted to make the color lighter? Darker?
Reflect and Share Together
After the paints have been cleaned up, display children’s finger paintings and any photos or videos taken during the exploration time. Invite children to use the photos and paintings to share what they observed about using finger paints to mix colors and shades of color. Ask questions such as,
- How was the finger paint different from the paints you used in earlier explorations? How was it similar?
- Could you mix some of the same colors with both types of paint? Why or why not?
- What was the darkest color you mixed? How did you make that color?
Have each child dictate or write one observations on a separate sheet of paper. When paintings are dry, tape the observations on the bottom of the paintings and display them in the Art Center. If you have a photo of each child exploring, you may want to tape these at the bottom of each painting as well.
Take It Further: You might want to replay the Between the Lions "Finger Paints" video poem and discuss the author's use of vocabulary, such as squish, slide, swish, swoosh, etc. now that children have the knowledge and experience of spreading the finger paints around.
Social Emotional Tip: Finger painting provides children with a safe, fun way to be creative, experience a new texture, and express their feelings.
Adaptation: If you have children with tactile sensitivities or children who do not like to get messy in your group, you may want to have them start by using one finger to paint. You can have an inexpensive pair of gardening gloves on hand with one or two of the fingers cut out so the paint does not get all over their hands.
