- blue objects (different shades)
- cell phone or camera (optional)
- eyedroppers/pipettes
- food coloring (blue)
- ice cube trays (white) (1 for each child)
- plastic bottle
- plastic cups
- water
- blue
- color
- dark
- darker
- light
- lighter
- mix
- pipette
- shade
Head Start Outcomes:
Logic and Reasoning/Reasoning and Problem Solving: Recognizes cause and effect relationships.
Science Knowledge/Scientific Skills and Method: Uses senses and tools, including technology, to gather information, investigate materials, and observe processes and relationships.
Science Knowledge/Scientific Skills and Method: Collects, describes, and records information through discussions, drawings, maps, and charts.
PreK Learning Guidelines:
Science and Technology/ Inquiry Skills 3: Identify and use simple tools appropriately to extend observations.
English Language Arts/Language 2: Participate actively in discussions, listen to the ideas of others, and ask and answer relevant questions.
Explore Together (indoors): Indoor Color

© Commonwealth of Massachusetts, Department of Early Education and Care (Jennifer Waddell photographer). All rights reserved.
STEM Key Concepts: There are many different colors; A color can have many different shades (from very light to very dark); Diluting colored water with clear water creates a lighter shade of the same color
ELA Focus Skills: Build Vocabulary, Listening and Speaking, Follow Directions
Educator Prep: Put several drops of blue food coloring in a bottle of water—make sure the color is fairly dark and intense. Provide each child with an ice cube tray, a cup of clear water, and a pipette (eyedropper). Pour some of the colored water in the first compartment of each ice cube tray.
Have children explore making different shades of the color blue with colored water. First, review the vocabulary terms light, lighter, dark, and darker by holding up items of different shades of blue.
Tell children they are going to explore making different shades or the color blue.
- Display the materials and demonstrate how to use a pipette. Use clear water.
- Allow time for children to practice handling the tool.
Once all children are comfortable using the pipettes, explain that they will be using clear and colored water to mix shades of blue. Say, Everyone will have their own tray to explore, but as you explore, turn and talk to others in your group to share what you are observing.
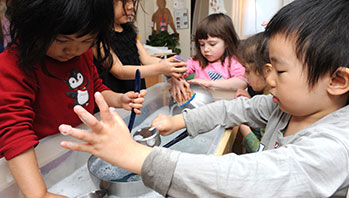
Provide time for children to freely explore the materials. Encourage them to create twelve different shades of blue by mixing varying amounts of colored and clear water in their trays. While children explore, listen for use and understanding of content vocabulary words. Take photos as children make observations. Ask questions such as,
- What do you think will happen if you add more water?
- What did you do to make your color darker than Julio's color?
- Point to a color and say, This color looks like a different shade than that one; how did you make that shade? Can you describe the two shades?
Reflect and Share Together
Spark discussion about what children have learned during their explorations. Revisit the “Colors” chart as you display photos or videos taken during their exploration and ask questions such as,
- What did you do to make the color darker (lighter)?
- What did you do to make the lightest color?
Take It Further: You may want to document children’s exploration of colored water by using a cell phone or camera to take photos of their ice cube trays filled with different shades. Make sure to take at least one picture of each child’s work.
Social Emotional Tip: Help children work together by demonstrating how to encourage one another as they discover new things about different shades of color.
Educator Tip: Be sensitive to differences among children. Some children may see and describe color differences with ease. Others may need different degrees of educator support. For example, line up the colors in order of shade and prompts the children to repeat after you, “This one is light blue; this one is lighter blue; this one is the lightest blue.” Or, display three objects and ask children to order and label them. Some children may not be able to distinguish differences in colors due to various types of color blindness.
Adaptation: If very young children have trouble using the pipettes or putting just a few drops into the water, give them other tools that will help them explore independently, such as a baster or a small spoon.
