- real or toy building tools (saw, hammer, nails, measuring tape)
- screwdriver
- small rectangular wood block (approx. 4 x 2) and three short screws (for each child)
- builder
- tool
MA Standards:
Speaking and Listening: SL.PK.MA.1 Participate in collaborative conversations with diverse partners during daily routines and play.
MA Draft Standards:
Physical Sciences/Matter and Its Interactions: Structure and Properties of Matter/PS1.A Describe, compare, sort and classify objects based on observable physical characteristics, uses, and whether it is manufactured as part of their classroom play and investigations of the natural and human-made world.
Head Start Outcomes:
Approaches to Learning/Persistence and Attentiveness Maintains interest in a project or activity until completed.
Science Knowledge/Scientific Skills and Method Observes and discusses common properties, differences, and comparisons among objects.
PreK Learning Guidelines:
Science and Technology/Technology and Engineering 23 Explore and describe a wide variety of natural and man-made materials through sensory experiences.
Science and Technology/Technology and Engineering 24 Demonstrate and explain the safe and proper use of tools and materials.
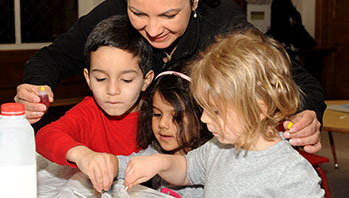
Small Group: Tools for Building

© Commonwealth of Massachusetts, Department of Early Education and Care (Jennifer Waddell photographer). All rights reserved.
STEM Key Concepts: Different materials are useful for making different structures and different parts of structures
ELA Focus Skills: Creative Expression, Small Motor Skills, Follow Directions, Sequence, Vocabulary
Educator Prep: Familiarize yourself with using a small drill and screwdriver. For each block of wood, drill a hole at the top for hanging. Drill three holes in each block for children (they will drive a screw into each). Have materials and a completed key holder on display in the Art Center as you introduce the activity. Have a key holder prepared for demonstration.
Open the discussion by asking children what they know about tools. Ask, Have you ever used a tool? For what reason? Display the tools as you introduce children to the idea that, when they build, builders use different tools with different materials. Ask children to hold up a tool and describe what it does. Encourage other children to touch the tool and talk about how to use it. Explain that a tool is something that makes work easier.
Tell children that people use tools to build many things. Explain to children that they will build something to bring home to their families. Hold up your key holder and demonstrate hanging a key from it. Say, This is a key holder, a place to hang your keys. To make this key holder, I used some of the same tools a builder uses to build a house.
Ask children to point to and describe any tools they think you used in making the key holder. Tell children they are going to use the tools to make a key holder to take home. Point to your key holder and the tools you used as you describe the process.
- First, I used a tool to drill the hole in the top. When the key holder is finished I can hammer a nail through this hole and hang it on the wall. Demonstrate by putting a nail through the hole and act out hammering it on the wall.
- Then say, Next I drilled the holes for the screws. Demonstrate how you made each hole.
- Point to the screws and ask, What do you think I did next?
Have children write their name or draw a picture on the back of their block of wood. Then have them decorate it using markers if they wish. Finally, have them drive in one screw at a time.
Adaptation: For groups with very young children, you may need to make the starter hole deeper and use larger screws and a bigger screwdriver so children can hold and turn it comfortably.
Adaptation: For groups with very young children, you may need to have their screws already loosely in place so they can make one or two final turns with the screwdriver.
Adaptation: You may want to pair an older child with strong small motor skills with a younger child to complete the key holder.
